Looking for cool math games that involve remembering positions? This guide focuses on memory match position notes in our own local Memory Match. This site is independent of the official Coolmath Games website, and the local game is a separate implementation.
A recall system should make two sightings easy to connect. Coordinates, short row descriptions or a regular scan can help, but only if you use the same convention throughout a board.
A practical starting point
Choose a simple label for each position and stick to it. When a symbol appears again, connect the new sighting to the earlier address before selecting another unknown card.
Use addresses that survive a conversation
Row and column labels work when everyone uses the same orientation. Decide which edge is the top of the board and whether a pair of numbers means row-then-column. A reversed convention can turn a correct recollection into an incorrect card choice. After a matched pair leaves play, update the record so that it does not point to cards that are no longer available. Treat the notes as temporary information for the current board, especially after a restart or page reload.
A mistake to watch for
Avoid changing labels halfway through a round. Left can mean different things after a device is rotated or a board is viewed from another seat. A stable coordinate is less ambiguous.
Worked examples and practice decisions
Try each question before reading its explanation. These examples are deliberately limited to the information they state. They separate a rule or calculation from a broader judgement about a complete game.
1. Board record 1: connect two sightings
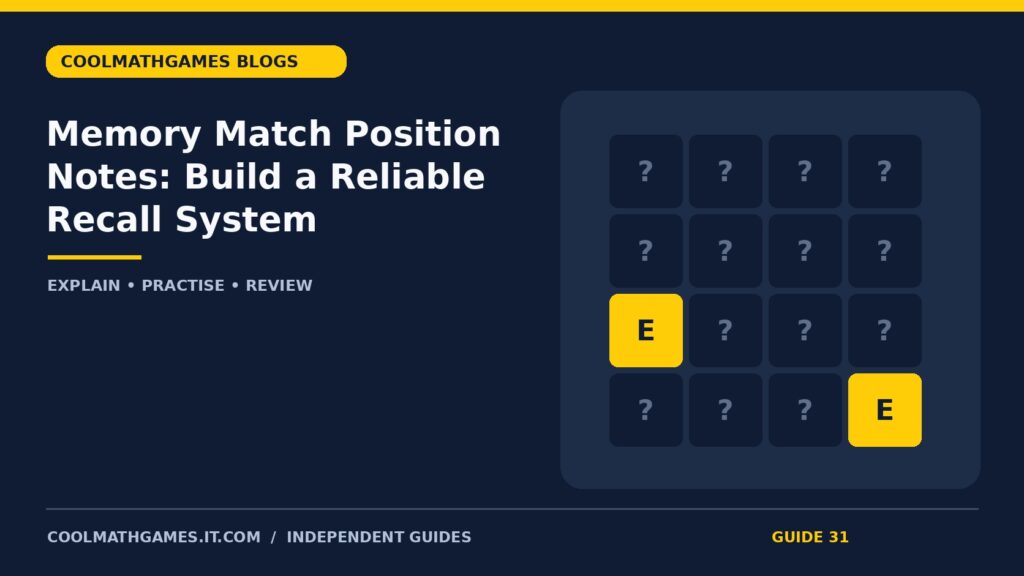
Your notes identify symbol E at row 3, column 1 and the same symbol at row 4, column 4. These are two different cards on the same illustrative board. Reconstruct the two locations on a four-by-four sketch. Do not use these positions as a prediction for the next live board: the actual game shuffles its cards.
Use the same coordinate convention for both sightings. A note such as “E, 3-1” needs an agreed row-then-column order. If you reverse that order for the second note, you can point to the wrong card even while remembering the symbol correctly.
Recall check: hide the record and name both addresses of E. Then verify the addresses, not merely the symbol. If the live board is restarted, discard the old locations. For a second written exercise, describe a consistent scan through the four rows and explain how you would distinguish a card you have not seen from one whose position you have forgotten.
2. Board record 2: connect two sightings
Your notes identify symbol D at row 4, column 1 and the same symbol at row 1, column 1. These are two different cards on the same illustrative board. Reconstruct the two locations on a four-by-four sketch. Do not use these positions as a prediction for the next live board: the actual game shuffles its cards.
Use the same coordinate convention for both sightings. A note such as “D, 4-1” needs an agreed row-then-column order. If you reverse that order for the second note, you can point to the wrong card even while remembering the symbol correctly.
Recall check: hide the record and name both addresses of D. Then verify the addresses, not merely the symbol. If the live board is restarted, discard the old locations. For a second written exercise, describe a consistent scan through the four rows and explain how you would distinguish a card you have not seen from one whose position you have forgotten.
3. Board record 3: connect two sightings
Your notes identify symbol C at row 3, column 2 and the same symbol at row 1, column 4. These are two different cards on the same illustrative board. Reconstruct the two locations on a four-by-four sketch. Do not use these positions as a prediction for the next live board: the actual game shuffles its cards.
Use the same coordinate convention for both sightings. A note such as “C, 3-2” needs an agreed row-then-column order. If you reverse that order for the second note, you can point to the wrong card even while remembering the symbol correctly.
Recall check: hide the record and name both addresses of C. Then verify the addresses, not merely the symbol. If the live board is restarted, discard the old locations. For a second written exercise, describe a consistent scan through the four rows and explain how you would distinguish a card you have not seen from one whose position you have forgotten.
4. Board record 4: connect two sightings
Your notes identify symbol A at row 4, column 4 and the same symbol at row 2, column 2. These are two different cards on the same illustrative board. Reconstruct the two locations on a four-by-four sketch. Do not use these positions as a prediction for the next live board: the actual game shuffles its cards.
Use the same coordinate convention for both sightings. A note such as “A, 4-4” needs an agreed row-then-column order. If you reverse that order for the second note, you can point to the wrong card even while remembering the symbol correctly.
Recall check: hide the record and name both addresses of A. Then verify the addresses, not merely the symbol. If the live board is restarted, discard the old locations. For a second written exercise, describe a consistent scan through the four rows and explain how you would distinguish a card you have not seen from one whose position you have forgotten.
5. Board record 5: connect two sightings
Your notes identify symbol A at row 4, column 2 and the same symbol at row 3, column 2. These are two different cards on the same illustrative board. Reconstruct the two locations on a four-by-four sketch. Do not use these positions as a prediction for the next live board: the actual game shuffles its cards.
Use the same coordinate convention for both sightings. A note such as “A, 4-2” needs an agreed row-then-column order. If you reverse that order for the second note, you can point to the wrong card even while remembering the symbol correctly.
Recall check: hide the record and name both addresses of A. Then verify the addresses, not merely the symbol. If the live board is restarted, discard the old locations. For a second written exercise, describe a consistent scan through the four rows and explain how you would distinguish a card you have not seen from one whose position you have forgotten.
6. Board record 6: connect two sightings
Your notes identify symbol E at row 2, column 2 and the same symbol at row 2, column 1. These are two different cards on the same illustrative board. Reconstruct the two locations on a four-by-four sketch. Do not use these positions as a prediction for the next live board: the actual game shuffles its cards.
Use the same coordinate convention for both sightings. A note such as “E, 2-2” needs an agreed row-then-column order. If you reverse that order for the second note, you can point to the wrong card even while remembering the symbol correctly.
Recall check: hide the record and name both addresses of E. Then verify the addresses, not merely the symbol. If the live board is restarted, discard the old locations. For a second written exercise, describe a consistent scan through the four rows and explain how you would distinguish a card you have not seen from one whose position you have forgotten.
7. Board record 7: connect two sightings
Your notes identify symbol F at row 2, column 3 and the same symbol at row 4, column 3. These are two different cards on the same illustrative board. Reconstruct the two locations on a four-by-four sketch. Do not use these positions as a prediction for the next live board: the actual game shuffles its cards.
Use the same coordinate convention for both sightings. A note such as “F, 2-3” needs an agreed row-then-column order. If you reverse that order for the second note, you can point to the wrong card even while remembering the symbol correctly.
Recall check: hide the record and name both addresses of F. Then verify the addresses, not merely the symbol. If the live board is restarted, discard the old locations. For a second written exercise, describe a consistent scan through the four rows and explain how you would distinguish a card you have not seen from one whose position you have forgotten.
8. Board record 8: connect two sightings
Your notes identify symbol C at row 1, column 1 and the same symbol at row 3, column 2. These are two different cards on the same illustrative board. Reconstruct the two locations on a four-by-four sketch. Do not use these positions as a prediction for the next live board: the actual game shuffles its cards.
Use the same coordinate convention for both sightings. A note such as “C, 1-1” needs an agreed row-then-column order. If you reverse that order for the second note, you can point to the wrong card even while remembering the symbol correctly.
Recall check: hide the record and name both addresses of C. Then verify the addresses, not merely the symbol. If the live board is restarted, discard the old locations. For a second written exercise, describe a consistent scan through the four rows and explain how you would distinguish a card you have not seen from one whose position you have forgotten.
9. Board record 9: connect two sightings
Your notes identify symbol G at row 1, column 4 and the same symbol at row 2, column 1. These are two different cards on the same illustrative board. Reconstruct the two locations on a four-by-four sketch. Do not use these positions as a prediction for the next live board: the actual game shuffles its cards.
Use the same coordinate convention for both sightings. A note such as “G, 1-4” needs an agreed row-then-column order. If you reverse that order for the second note, you can point to the wrong card even while remembering the symbol correctly.
Recall check: hide the record and name both addresses of G. Then verify the addresses, not merely the symbol. If the live board is restarted, discard the old locations. For a second written exercise, describe a consistent scan through the four rows and explain how you would distinguish a card you have not seen from one whose position you have forgotten.
10. Board record 10: connect two sightings
Your notes identify symbol E at row 4, column 1 and the same symbol at row 2, column 2. These are two different cards on the same illustrative board. Reconstruct the two locations on a four-by-four sketch. Do not use these positions as a prediction for the next live board: the actual game shuffles its cards.
Use the same coordinate convention for both sightings. A note such as “E, 4-1” needs an agreed row-then-column order. If you reverse that order for the second note, you can point to the wrong card even while remembering the symbol correctly.
Recall check: hide the record and name both addresses of E. Then verify the addresses, not merely the symbol. If the live board is restarted, discard the old locations. For a second written exercise, describe a consistent scan through the four rows and explain how you would distinguish a card you have not seen from one whose position you have forgotten.
Use the guide in your next session
Try explaining one discovered pair to another person without pointing. If the description identifies exactly two cards, the notation is probably clear enough for your next practice board.
Begin with one observation connected to memory match position notes. After checking an example, close the answer and reconstruct the reasoning in your own words. If a step is uncertain, return to that step rather than repeating a result you cannot explain. A small, specific correction provides a clearer next aim than trying to improve every part of a game at once.
Frequently asked questions
Does the written layout predict the live board?
No. The live board shuffles. The coordinates in these examples belong only to their illustrative records.
When does a move count increase?
In this local implementation, a second different card completes a move. The first selection alone is not a completed pair selection.
Is a shared-device activity an online team mode?
No. It is an agreement between people sharing the local board, with no separate online multiplayer feature implied.
More cool math games guides
- Memory Match Guide: Rules and a Clear First Board
- Memory Match Move Counts: Measure a Round Fairly
- Open the relevant game or guide page
Sources and scope
This is an independent, AI-assisted editorial guide. The worked examples and diagrams are original teaching material, not official game screenshots or a claim of personal live-game testing. Game interfaces can change; check the current instructions when controls or rules differ.